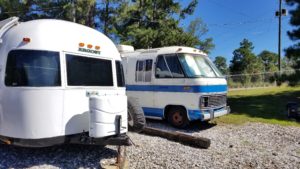
One of the most popular renovation to any Vintage Trailer is, without a doubt, painting. Exterior and Interior painting a Vintage Trailer is a lot of work that brings the most reward.
Check out our extensive articles on Exterior Painting.
https://www.argosytraveling.com/2020/06/08/exterior-painting-vintage-trailers/
If not done correctly, your paint will peel and all your hard work will be for naught. It takes a small amount of pre-preparation and selecting the correct paint.

For full Paint Prepping Instructions:
https://www.argosytraveling.com/2018/10/22/painting-airstream-walls/
It doesn’t matter if your trailer/RV is new or vintage, gutted or still has walls, we like to start with a trio of wiping it down. We start with a quick efficient wipe down with an awesome product called Tub O’ Towels (great for removing paint off your hands too!). This product gets the initial dirt off and makes it easier for the next step: Scratching the Surface.

A quick rough pass with a sanding block is one of the biggest tips to successfully painting the interior of your trailer. Scratching the Surface walls helps “open” them up for further cleaning & the application of paint. In Vintage Airstream and Argosy trailers, there is a sort of chemical (commonly called “gas” by fellow Airstreamers) that normal cleaning supplies never ever manage to cut through. Take your sanding block and scratch away on every surface you want to paint.
With all the sanding dust on your walls, use disinfectant wipes to wipe off all the dust. It will take a lot of wipes so have a couple of disinfectant canisters handy. These are great to use after the last step of TSP too.

The final step of pre-preparation is TSP. Almost every experienced Vintage Trailer/RV restorer knows that the best way to get rid of old smells, stains, stickiness, mold, mildew and leftovers from critters is to use TSP. TSP needs to be handled properly. When using TSP to clean your trailer’s walls, use gloves and open up windows. I also use a mask because I have severe allergies and TSP is cleaning up things that activate my allergies. Use hand towels soaked in TSP to wipe/scrub every surface for painting. Be diligent and get into every nook and cranny.

Just a quick look around Pinterest and it’s easy to see that, overwhelmingly, most paint their Trailers with a version of white paint. We love white paint and used it in our Vintage Motorhome. But, our trailer decor leans more towards gray and brown leather so I picked a “griege” paint from our local Home Depot vs our favorite white.
Our favorite white is West Highland White by Sherwin Williams, which can be bought anywhere and we encourage you to buy anywhere BUT SW . West Highland White is a white that is not bright, beige or gray. It truly is the perfect white!
West Highland White Paint

When picking our paint color for the walls, I noticed that the paint samples did not match the color online. The samples were much lighter in person and on the walls.
Choose a slightly darker sample than what you want.
Tambours have slightly different Painting Needs. Check out our Article on Painting Tambours.
You are ready to paint! Choose a paint that has a primer + paint. A lot of people do a coat of Kilz Primer but we have always found that a good quality paint that has a primer also works great. We always use paint from Home Depot and Ace Hardware mostly because they are near us. I got extremely lucky and found an “oops” paint for $2/quart that was also a Stain Blocker. The color on the can looked like the perfect “griege” but ended up much lighter on our walls. We only needed a quart to paint the interior. Our Argosy is not gutted and we did not paint the bathroom. We also did not paint behind tambours or closets that are hidden from view.
Trivia: We were told by our local Home Depot paint department that 95% of “oops” paint is from customers that requested custom colors that didn’t quite turn out right.

Use a Foam Roller to get the best smooth coverage. The paint easily glides off the foam roller and leaves the surface nap free. What is left behind is a suede like surface from the original walls. We also used a small craft foam and small paint brush to get into corners and for edging.

The walls and ceiling will need two coats. The end caps will need a minimum of three coats due to being made of a different material.

For someone not ever wanting to paint over the original walls, I am now wondering what took me so long. I love the original look but the walls felt gross and needed an update. Also, painting is so much easier than wallpapering Airstream walls. We prepped one day and painted the next The actual painting was done in about two hours with two people. This is definitely a quick weekend project that completely transforms your Trailer/RV.


A few quick notes:
- We replaced our J Trim (the plastic trim pieces that are vertically attached to the walls) since the original was cracked and orange.
- The white J Trim can be found at most hardware stores. We bought ours at Home Depot, found in the trim/crown moulding aisle, for about $3 for 6′. We needed two just for the back rounded walls.
- I haven’t decided what to do with the original orange-ish trim horizontally around the back so I left it alone.
- We decided against painting the front and back tambours at this time. I liked the contrast.
- I don’t know the color of the paint since it was a can of “oops”. It looks more tan in the can and more gray on the walls. I did get it color matched and think the sample below is extremely close to our “oops” paint.


